Think of roof flashing as your home's rain jacket – it's that crucial barrier keeping water from sneaking into your roof's most vulnerable spots. Want to know what goes into a proper installation? Let's break it down!
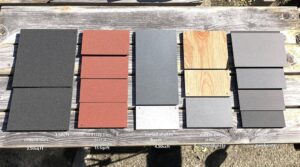
Your material choices can make or break the project. While galvanized steel offers sturdy protection, aluminum brings lightweight durability, and copper adds that touch of luxury (though it'll cost you more). Expect to invest $5-25 per linear foot, depending on your pick.
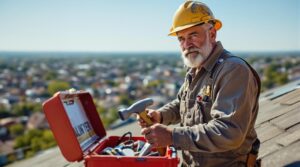
For perspective, if you've got a 2,000-square-foot home, you're looking at roughly 100-300 linear feet of flashing to keep those pesky leaks at bay. The pros who'll tackle this job typically charge $45-75 per hour, bringing their expertise and safety gear to ensure everything's watertight.
Speaking of expertise, did you know proper flashing installation is as much art as science? It's not just about slapping metal around your roof's weak points – it's about precise measurements, strategic overlapping, and understanding how water flows. Getting it right can mean the difference between a dry attic and a costly mess.
And if you're dealing with insurance claims, having a public adjuster in your corner can be a game-changer. Their know-how often leads to significantly higher settlements, protecting both your roof and your wallet.
Key Takeaways
Want to Master Roof Flashing? Let's Break Down the Costs & Installation!
Think of roof flashing as your home's raincoat – it's that crucial barrier keeping water from sneaking into all the wrong places. Let's dive into what you need to know!
The Price Tag Breakdown:
- Budget-Friendly Champion: Aluminum flashing ($5-10 per linear foot) – perfect for cost-conscious homeowners
- Premium Defender: Copper flashing ($15-25 per linear foot) – the "forever" solution that ages like fine wine
Size Matters:
Your average 2,000-square-foot home isn't playing around – it'll need 100-300 linear feet of flashing to stay properly protected. That's like wrapping your house with a waterproof belt!
The Pro Touch:
Skilled installers typically charge $45-75 hourly, but remember – prices dance to different tunes depending on where you live and how tricky your roof's personality is.
Installation Golden Rules:
- Think "waterfall effect" with 2-3 inch overlaps
- Don't skip the kickout flashing (those sneaky corner spots love to leak!)
- Corner flashing is your first line of defense
Watch Out For These Rookie Moves:
- Eyeballing overlaps (your tape measure is your best friend)
- Getting creative with cutting (precision beats improvisation)
- Playing fast and loose with manufacturer instructions (they wrote them for a reason!)
Understanding Roof Flashing Types and Materials
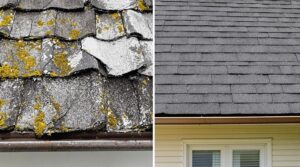
Roof flashing serves as a critical waterproofing barrier that protects vulnerable areas of a roofing system from water infiltration. Common materials include galvanized steel, aluminum, copper, lead, and synthetic options like rubber and modified bitumen. Each material offers distinct advantages based on specific application requirements and material durability characteristics.
Galvanized steel, available in various gauges, provides excellent corrosion resistance and structural integrity.
Aluminum offers lightweight maneuverability and cost-effectiveness but requires special coating when used with masonry or in coastal environments.
Copper, known for its exceptional longevity, develops an aesthetic patina over time. Lead continues to demonstrate reliable performance through centuries of use.
Professional installation techniques vary by material type and application area. Building codes often dictate material specifications and minimum thickness requirements.
Selection factors include environmental conditions, compatibility with existing roofing materials, local regulations, and budget considerations. Proper material choice and installation guarantee maximum performance and extended roof system longevity.
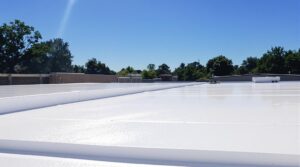
Proper flashing installation combined with elastomeric coating systems can provide superior waterproofing protection while extending roof life.
Essential Tools and Safety Equipment for Installation

Professional flashing installation requires a thorough set of specialized tools and safety equipment to guarantee both quality workmanship and worker protection.
Essential tools include precise metal cutting implements, measuring equipment, fastening tools, and appropriate sealants.
Regular tool maintenance safeguards peak performance and longevity of these critical implements.
Safety protocols demand complete fall protection systems, including properly rated safety harnesses, secure anchoring points, and shock-absorbing lanyards.
Personal protective equipment, such as hard hats, safety glasses, and appropriate gloves, is mandatory for all roofing work.
Installation teams must also utilize proper debris management tools and maintain clear walkways during the project.
Before beginning installation, workers must conduct systematic safety checks, including surface debris removal, equipment inspection, and proper ladder positioning.
All safety equipment must comply with local regulations, and installation should only proceed when weather conditions permit safe roof access.
Starting from the roof peak downward, crews should work systematically in controlled sections to maintain safety and efficiency.
Step-by-Step Installation Guide

With proper tools and safety measures in place, a methodical installation process begins with thorough surface preparation.
The installation sequence starts by removing existing shingles and installing underlayment with waterproof tar or felt for enhanced protection. Surface inspection and cleaning are essential before proceeding.
The mounting techniques follow a specific order, beginning with corner flashing installation. Pre-made or custom corner pieces are secured with nails and sealant, creating a foundation for subsequent step flashing.
Step flashing installation continues along the roof-wall intersection, with each piece overlapping by 2-3 inches and being properly nailed within 1 inch of the upper edge.
Kickout flashing completes the system at the base corner, requiring secure attachment to both roof edging and siding. Each component must be properly sealed with roofing cement, ensuring watertight connections throughout the entire system. This methodical approach guarantees maximum water diversion and roof protection.
Professional installation typically costs between $45-75 per hour for skilled labor to ensure proper flashing placement.
Common Installation Mistakes to Avoid

Successful flashing installation requires careful attention to detail and awareness of common pitfalls that can compromise roof integrity. Several critical errors can lead to significant water damage and structural issues if not addressed properly.
Primary installation mistakes include improper overlap between flashing sections and faulty cutting of materials, which create vulnerable points for water infiltration.
Contractors often ignore manufacturer guidelines or fail to secure flashing adequately, leading to premature failure. Material selection errors, such as using incompatible products or failing to account for thermal expansion, can seriously compromise the roof system's effectiveness.
Professional expertise is essential for avoiding these common mistakes. DIY attempts frequently result in inadequate installations due to lack of specialized tools and technical knowledge.
Regular inspections and maintenance by qualified contractors help identify potential issues before they escalate into major problems, ensuring the longevity and effectiveness of the flashing system.
Proper installation requires thermal imaging technology and moisture meters to detect hidden damage that could affect flashing performance.
Breaking Down Cost Factors and Estimates

Understanding the financial scope of roof flashing installation requires careful analysis of multiple cost variables that impact the overall project budget.
Material selection represents a significant cost factor, with options ranging from economical aluminum at $5-$10 per linear foot to premium copper at $15-$25 per linear foot.
Budget planning must account for project complexity, as roof design substantially influences installation costs. Simple structures require less material and labor compared to complex configurations with multiple peaks and valleys.
Labor rates typically range from $50-$100 per hour, varying by location and expertise level. For a 2,000-square-foot home, cost variations stem from requiring between 100-300 linear feet of flashing.
Geographic location affects both material and labor costs, with urban areas generally commanding higher prices.
Additional cost considerations include disposal fees, seasonal timing, and potential structural repairs. Weather conditions in specific regions may necessitate specialized materials, further impacting the total investment.
For insurance-related installations, public adjusters optimize settlement amounts by 30-50% through specialized claims knowledge and detailed damage documentation.
The Benefits Of Consulting A Public Adjuster

When dealing with roof flashing damage claims, consulting a licensed public adjuster provides critical expertise in maneuvering complex insurance policies and accurately documenting damage assessments.
Public adjusters serve as objective third-party professionals who thoroughly evaluate the full scope of flashing damage while managing all aspects of the claims process to guarantee regulatory compliance.
Their specialized knowledge and advocacy typically result in higher claim settlements compared to self-filed claims, as they identify additional covered damages that property owners might otherwise overlook.
Studies demonstrate that property owners who work with public adjusters receive 800% higher settlements when compared to those who handle claims independently.
Expertise In Insurance Claims
Insurance claims for roof flashing damage require specialized knowledge and expertise that public adjusters provide through their professional services. These professionals possess thorough understanding of policy interpretation and can effectively navigate complex insurance disputes. Their in-depth knowledge of insurance procedures enables accurate assessment of coverage and exclusions.
Public adjusters streamline the claims process by managing documentation, negotiations, and technical assessments. They guarantee all damage-related costs are properly calculated and included in claims submissions.
Their strategic negotiation skills often result in higher settlement amounts compared to policyholder-managed claims. Working on a contingency basis, public adjusters alleviate the financial burden while maximizing compensation.
Their expertise helps prevent underpayment and guarantees policyholders receive fair settlements that reflect the full extent of roof flashing damages.
Studies show that claims handled by public adjusters result in settlements up to 800% higher compared to independently managed claims.
Objective Damage Assessment
Professional damage assessment through a public adjuster delivers essential objectivity in evaluating roof flashing claims. These independent experts follow rigorous damage protocols to document and evaluate the full scope of roofing issues, ensuring thorough assessment criteria are met during inspections.
Public adjusters compile exhaustive documentation through photographs, videos, and detailed written reports that establish the extent of flashing damage. This systematic approach serves multiple critical functions: determining liability, supporting accurate claim valuations, and facilitating efficient settlements with insurance carriers.
Their thorough evaluations minimize potential disputes by providing clear evidence of damages while establishing precise monetary values for repairs or replacements. The resulting assessment becomes a crucial tool for negotiating fair compensation and can serve as credible documentation should legal proceedings become necessary.
Unlike insurance company adjusters who protect carrier interests, public adjusters represent homeowners exclusively when evaluating damage claims.
Streamlined Claim Process
Engaging a public adjuster substantially streamlines the roof flashing claim process through systematic management of documentation, communication, and negotiation phases. These professionals implement claim optimization strategies, ensuring thorough documentation of damage while maintaining efficient workflows throughout the settlement process.
Through process automation and standardized procedures, public adjusters reduce administrative burdens on property owners while expediting claim resolution. Their expertise typically results in 30% higher recovery rates compared to self-managed claims.
Professional adjusters provide 24-hour response times and regular updates throughout the entire claims process, ensuring property owners stay informed at every stage.
Higher Claim Payouts & Settlements
Empirical data consistently demonstrates that public adjusters secure substantially higher claim settlements for roof flashing damages, with average payouts exceeding self-managed claims by 20-25%. Their expertise in documentation and negotiation markedly improves claim accuracy while reducing settlement duration. Professional adjusters meticulously evaluate all damage aspects, guaranteeing thorough coverage of repair costs.
| Settlement Factor | Public Adjuster Impact |
|---|---|
| Documentation | Enhanced detail & precision |
| Valuation | Expert material assessment |
| Negotiation | Strategic industry leverage |
| Coverage | Maximized policy benefits |
| Resolution | Expedited settlement process |
This specialized representation typically results in settlements averaging $22,266 compared to $18,659 for self-managed claims. Public adjusters' thorough understanding of Actual Cash Value calculations and construction codes guarantees policyholders receive complete compensation for all applicable damages, including often-overlooked components like proper flashing installation and related water damage repairs. The initial claim acknowledgment typically takes between 10-30 days before a formal evaluation process begins.
About The Public Claims Adjusters Network (PCAN)

The Public Claims Adjusters Network (PCAN) stands as a nationwide organization of licensed, pre-vetted insurance claim specialists dedicated to protecting policyholders' interests. With extensive network coverage across multiple regions, PCAN connects property owners to qualified public adjusters who specialize in insurance claim management and settlement negotiations.
Member qualifications undergo rigorous verification, ensuring each adjuster maintains proper licensing, demonstrated expertise, and a track record of successful claim resolutions.
PCAN adjusters provide essential services including detailed damage assessments, policy analysis, and thorough claim documentation. Their independent status enables unbiased representation focused solely on maximizing policyholder recovery.
The organization streamlines the claims process through systematic procedures, professional documentation, and effective communication channels between all parties. PCAN's structured approach reduces claim processing time while maintaining high standards of accuracy and completeness in settlement negotiations, ultimately serving to protect policyholder interests throughout the entire claims process.
Frequently Asked Questions
How Long Does Roof Flashing Typically Last Before Needing Replacement?
Roof flashing material lifespan varies from 15-100 years depending on material type, with weather impact substantially affecting durability. Aluminum lasts 20-30 years, while copper and lead can exceed 50 years.
Can I Install New Flashing Over Existing Old Flashing?
Direct installation over existing flashing is not recommended due to potential layering risks. Best practice requires removing old flashing to guarantee proper water-tight seals and maintain structural integrity.
What Are Signs That Indicate Roof Flashing Needs Immediate Repair?
Like dark omens on pristine walls, water stains, ceiling cracks, visible rust, and loose/detached flashing segments demand immediate attention. Interior leaks and compromised seals indicate critical roof flashing failure requiring professional repair.
Does Homeowner's Insurance Typically Cover Roof Flashing Damage?
Homeowner's insurance coverage typically extends to roof flashing damage caused by covered perils, subject to claim requirements, deductibles, and policy specifics. Damage from normal wear or inadequate maintenance remains excluded.
How Often Should Roof Flashing Be Inspected for Potential Problems?
Like sentinels guarding against nature's assault, roof flashing requires professional inspection annually, with additional seasonal checkups recommended based on local weathering patterns and after severe weather events.
References
- https://aabrite.com/roof-flashing-what-is-it-how-do-you-install-it/
- https://neilpatel.com/blog/how-to-write-data-driven-content/
- https://www.angi.com/articles/how-to-install-roof-flashing.htm
- https://www.equinetmedia.com/guide-to-b2b-research-content
- https://bayvalleyroofing.com/blog/how-to-install-roof-flashing/
- https://boss-exteriors.com/blog/types-of-roof-flashing/
- https://trustbrightside.com/4-common-materials-used-for-roof-flashings/
- https://www.cloudroofing.com/blog/what-is-roof-flashing
- https://www.iko.com/blog/what-is-roof-flashing-how-to-install-it/
- https://metalformersinc.com/best-roof-flashing-types-and-techniques/