Want to protect your roof like a shield? Let's talk about drip edge installation – your roof's first line of defense against water damage!
Think of drip edge as your roof's rain boots. You've got options: budget-friendly vinyl starting around $1.40 per linear foot, trusty aluminum in the middle range at $3-$8, or premium copper at $10-$23 for those seeking lasting elegance.
But here's the real scoop: while DIY might tempt you, professional installation ensures your drip edge performs like a champ. New roof installations typically run $1.50-$3.00 per linear foot, while retrofitting existing roofs costs $5-$9, plus skilled labor at $45-$75 hourly.
Getting it right isn't just about nailing things down – proper installation is an art! Your contractor will create a watertight seal with 2-inch overlaps, strategic nail placement every 12-18 inches, and specialized tools to ensure everything fits snugly. It's like putting together a waterproof puzzle that protects your home's foundation, siding, and structural integrity.
Ready to give your roof the protection it deserves? The right drip edge installation today means worry-free tomorrows when those storm clouds roll in.
Key Takeaways
Want to protect your roof like a shield? Let's dive into the world of drip edge installations – your roof's first line of defense against water damage!
Installing a fresh drip edge on a new roof will set you back $1.50-$3.00 per linear foot, while retrofitting an existing roof costs $5.00-$9.00. Think of it as investing in a raincoat for your home's perimeter!
Your material choices range from budget-friendly aluminum to premium copper, with prices varying as much as your coffee options – from a basic $1.40 to a luxurious $23.10 per linear foot. Each brings its own personality to your roof's protection game.
When it comes to profiles, you've got three trusty sidekicks:
- Type C: The L-shaped champion
- Type D: The straight-leg warrior
- Type F: The extended-flange defender
Getting your hands dirty with installation? Remember these golden rules:
- Maintain 2-inch overlaps (think shingles doing the cha-cha)
- Secure with nails every 12-18 inches (like stitching a perfect seam)
- Use proper tools and safety gear (because nobody likes rooftop gymnastics without a safety net!)
Watch out for these rookie moves that could rain on your parade:
- Misaligned positioning
- Scattered nail spacing
- Skimpy section overlaps
Remember, a well-installed drip edge isn't just an accessory – it's your roof's best friend in the battle against Mother Nature!
Understanding Roof Drip Edge Types and Materials
When selecting a roof drip edge, contractors must evaluate both the appropriate type and material to guarantee maximum protection for the roofing system.
Material comparisons reveal distinct advantages across options: aluminum offers flexibility and corrosion resistance, galvanized steel provides enhanced wind resistance at 24-gauge thickness, copper delivers premium durability with aesthetic patina development, and vinyl presents a maintenance-friendly alternative despite impact vulnerability.
Profile selection encompasses three primary configurations: Type C featuring an L-shape with kick-out for basic protection, Type D offering a straight-leg minimalist design, and Type F incorporating an extended flange for high-wind areas. Local building codes and shingle specifications often dictate the required profile type.
Installation effectiveness depends on proper alignment along roof edges and secure attachment to the roof deck. Climate conditions, aesthetic requirements, budget constraints, and material compatibility with existing roofing components serve as critical factors in determining the ideal drip edge configuration for each project.
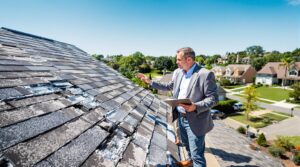
Professional installation is essential since improper placement can lead to future leak issues and costly repairs down the line.
Essential Tools and Preparation for Installation

Proper drip edge installation begins with assembling the complete set of necessary tools and safety equipment. Tool organization should include essential cutting implements like tin snips or aviation shears, measuring tape, hammer, and appropriate fasteners such as roofing nails or screws. Personal protective equipment, including safety gloves and goggles, is mandatory for worker protection.
Surface preparation is critical before installation commences. Contractors must thoroughly inspect the roof edge for structural integrity, removing any deteriorated materials, debris, or dirt.
The installation area requires thorough evaluation to determine ideal starting points and installation direction based on roof slope and water drainage patterns. Supporting materials, including felt underlayment, ice and water shield, and appropriate sealants, should be readily available.
A properly equipped caulk gun and roofing adhesive guarantee secure bonding of materials. Professional-grade ladders or scaffolding provide safe roof access during the installation process. Similar to complete roof replacements, contractors should conduct magnetic nail sweeps to ensure no loose fasteners remain in the work area.
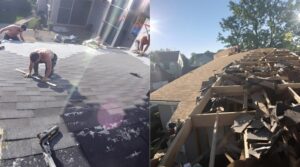
Step-by-Step Installation Guide

Following a systematic approach guarantees successful drip edge installation along roof perimeters.
The process begins at the eaves, where contractors position and align the drip edge to extend slightly over the fascia board. Installation tips emphasize maintaining consistent 2-inch overlaps at corners and securing sections with roofing nails every 12-18 inches.
Technical details specify using 45-degree miter cuts at corners to guarantee watertight joints and applying roofing cement along the top edge for enhanced protection.
Proper installation requires careful attention to the roof deck inspection**** to identify any damaged plywood that could compromise the drip edge effectiveness.
- Inspect and clean roof edges thoroughly before installation to guarantee proper adhesion
- Maintain precise alignment parallel to roof edges while securing sections
- Apply continuous bead of roofing cement between overlapping sections
- Create proper miter joints at corners using 45-degree cuts
- Verify complete coverage and proper water diversion along entire perimeter
The installation concludes with a thorough inspection, checking for secure fastening, proper alignment, and continuous barrier formation. Contractors must verify that all sections maintain proper overlap and that corners are adequately sealed to prevent water infiltration.
Common Installation Mistakes to Avoid

Even experienced contractors can encounter specific installation pitfalls that compromise drip edge effectiveness. Critical measurement errors include positioning the drip edge flush with the fascia board instead of maintaining the required 1 1/2 to 1 3/4 inch overhang, and improper shingle extension of 3/8 to 1/2 inch over the drip edge.
Installation gaps frequently occur due to inadequate fastening techniques, with proper nail spacing of 8-10 inches often overlooked.
Contractors must guarantee sufficient overlap of at least 2 inches between sections and apply appropriate sealant at joints to prevent water infiltration. Pre-installation oversights, such as failing to inspect the roof surface or clean the roof edge, can lead to premature system failure.
Local building code compliance and proper material selection based on climate conditions are essential considerations. Additionally, maintaining consistent overlap throughout the installation while ensuring correct alignment with the roof edge prevents future complications.
Professional evaluations involving moisture detection testing should precede any drip edge installation to identify potential underlying issues.
Cost Breakdown and Long-Term Value

Understanding drip edge installation costs requires analysis of material selection, labor expenses, and long-term value considerations.
A thorough material comparison reveals copper as the premium choice at $10.60-$23.10 per linear foot, while vinyl presents the most economical option at $1.40-$3.90.
Installation costs vary substantially between new construction ($1.50-$3.00 per linear foot) and existing roof applications ($5.00-$9.00 per linear foot), with labor rates ranging from $45-$75 hourly.
Investment analysis should consider:
- Material longevity versus initial cost (copper lasting 70-100+ years compared to vinyl's 10-20 years)
- Installation complexity factors, including roof accessibility and special equipment requirements
- Type selection impact (Type C versus Type D) on overall project expenses
- Labor cost variations between new and existing roof installations
- Long-term maintenance considerations based on material durability ratings
The total investment combines material costs ($1.40-$23.10 per linear foot) with installation expenses ($4.02-$10.70 per linear foot), varying by project specifications and material selection.
Projects requiring installation on roofs with steep pitch angles will typically increase overall costs by 10-30% due to additional safety equipment and labor time.
The Benefits Of Consulting A Public Adjuster

When considering roof drip edge installation claims, consulting a licensed public adjuster provides critical expertise in maneuvering through complex insurance policies and identifying all compensable damages.
Public adjusters conduct thorough, objective assessments of roof damage while managing the entire claims process, reducing the administrative burden on property owners.
Their contingency-based fee structure incentivizes maximum claim settlements, often resulting in higher payouts that can offset the cost of professional drip edge installation and associated repairs.
Studies show that claim settlements increase up to 800% when working with public adjusters compared to independently filed claims.
Expertise In Insurance Claims
Professional public adjusters serve as invaluable experts in managing the complex landscape of insurance claims related to roof drip edge damage and other structural issues. Their claims expertise encompasses thorough policy interpretation, documentation management, and strategic negotiations with insurance carriers.
Through specialized insurance knowledge and industry experience, these professionals navigate intricate claims processes while ensuring maximum policyholder benefits. Their insurance specialization enables them to interpret complex policy language and identify coverage opportunities that property owners might otherwise miss. Studies indicate that working with public adjusters increases settlements by up to 800% compared to unrepresented claims.
- Detailed assessment and documentation of roof drip edge damage
- Strategic presentation of claims to insurance carriers
- Expert interpretation of policy coverage and exclusions
- Thorough damage valuation and cost estimation
- Skilled negotiation for ideal settlement outcomes
These professionals leverage their expertise to streamline claims processes, maximize settlements, and protect policyholder interests throughout the entire claims journey.
Objective Damage Assessment
A complete objective damage assessment forms the cornerstone of successful insurance claims for roof drip edge installations and related structural issues. Public adjusters conduct thorough property inspections to evaluate and document the full extent of damage, ensuring accurate damage measurement and exhaustive documentation of all affected areas.
These independent professionals meticulously collect data through incident reports, photographic evidence, and direct observations to establish precise repair cost estimates. Their expertise proves invaluable when determining monetary losses associated with inadequate or damaged drip edge installations, including potential water damage to underlying structures. Unlike insurance company adjusters who protect insurer interests, public adjusters represent policyholders throughout the entire claims process.
Streamlined Claim Process
Through collaboration with public adjusters, property owners can substantially expedite their roof drip edge damage claims while minimizing administrative burdens.
Professional adjusters facilitate expedited processing through efficient coordination with insurance providers, conducting thorough assessments and managing all documentation requirements. Their expertise in policy interpretation and claims procedures guarantees accurate submission of materials, reducing delays and complications that often arise during the settlement process.
With higher settlement amounts typically secured by public adjusters compared to initial insurance offers, property owners often benefit financially from this professional partnership.
- Implements systematic documentation protocols for complete damage evidence
- Coordinates directly with insurance representatives to accelerate response times
- Manages technical compliance requirements for drip edge installation claims
- Executes strategic negotiation approaches based on industry-specific knowledge
- Streamlines communication channels between all involved parties for maximum efficiency
This professional oversight enables property owners to focus on restoration while safeguarding their claims receive proper attention and equitable settlement consideration.
Higher Claim Payouts & Settlements
Building on effective claims management processes, consulting a public adjuster can substantially increase claim payouts and settlement amounts for roof drip edge damage. Through extensive property assessments and detailed documentation, public adjusters identify damages that insurance company representatives might overlook, leading to more accurate claim valuations.
Their expertise in policy interpretation and negotiation strategies proves invaluable during claim disputes, often resulting in markedly higher settlements.
Public adjusters facilitate settlement acceleration through their thorough understanding of insurance procedures and documentation requirements. Working on a contingency basis, they are incentivized to maximize claim values while maintaining cost-effectiveness for property owners.
Their professional assessment methods guarantee all drip edge installation damages are properly documented and valued, preventing underestimation and securing just compensation for policyholders.
Licensed professionals must maintain complete independence from insurance companies while advocating for homeowners throughout the claims process.
About The Public Claims Adjusters Network (PCAN)

The Public Claims Adjusters Network (PCAN) represents a complete global alliance of licensed insurance claim professionals who advocate for policyholders during the claims process.
Through global partnerships, PCAN provides exhaustive support services, including damage assessment, policy interpretation, and settlement negotiations. Network benefits extend to both residential and commercial clients, guaranteeing maximum claim payouts across various jurisdictions.
Key aspects of PCAN's operational framework:
- Licensed adjusters operate under strict ethical guidelines and state regulations
- Compensation structure typically ranges from 2% to 25% of settled claims
- WorldClaim and similar organizations facilitate international claim management
- Disaster response teams deploy rapidly to affected areas
- Professional expertise includes detailed policy analysis and documentation
PCAN members maintain independence from insurance carriers, focusing solely on policyholder interests.
This structured approach guarantees thorough claim evaluation, proper documentation, and strategic negotiation throughout the settlement process, particularly beneficial in complex roofing claims requiring specialized knowledge.
Frequently Asked Questions
Can Drip Edge Be Installed in Winter Months?
Drip edge installation is feasible during winter months, though weather concerns and installation challenges require temperatures above 40°F, proper surface preparation, and specialized cold-weather installation techniques for ideal results.
How Often Should Roof Drip Edge Be Replaced?
Drip edge replacement intervals depend on lifespan assessment of materials: 15-20 years for galvanized steel/aluminum, 50+ years for copper. Scheduled maintenance inspections determine actual replacement timing based on wear conditions.
Will Installing Drip Edge Void My Roof Warranty?
Installing drip edge actually preserves roof warranties, as it meets manufacturer specifications and warranty requirements. Major shingle manufacturers mandate drip edge installation to maintain warranty coverage and guarantee proper roof performance.
Can I Paint My Drip Edge to Match My House?
Drip edge can be aesthetically enhanced through color matching with house trim. Professional-grade exterior paint, combined with proper surface preparation, guarantees maximum paint adhesion and a cohesive architectural appearance.
Does Insurance Typically Cover Drip Edge Replacement Costs?
Insurance typically covers drip edge replacement when damage occurs from sudden events, subject to policy requirements and claim deductibles. Coverage excludes normal wear and aging-related deterioration.
References
- https://mcclellandsroofing.com/blogs/installing-drip-edge/
- https://qualityedge.com/wp-content/uploads/2024/02/INTROOFG0922.pdf
- https://buildwithkraft.com/blog/how-to-install-drip-edge/
- https://quizlet.com/518760754/roof-installation-flash-cards/
- https://www.thisoldhouse.com/roofing/21019341/installing-a-drip-edge
- https://www.iko.com/blog/guide-to-drip-edges-for-shingle-roofs/
- https://todayshomeowner.com/roofing/guides/drip-edges-for-shingle-roofs/
- https://www.brexteriors.com/drip-edge-or-nah-the-ultimate-guide
- https://www.mightydogroofing.com/blog/categories/components/what-is-drip-edge/
- https://www.thisoldhouse.com/roofing/reviews/roof-drip-edge-types