Ready to tackle a roof replacement? Think of it as building a protective shield for your home – it's a methodical process that needs careful planning and expert hands. Let's break down this home improvement journey that'll keep you dry and cozy for years to come.
Before your first shingle comes off, you'll need proper permits and a solid game plan – just like you wouldn't start a road trip without a map! Once that's sorted, skilled roofers strip away old materials, giving your roof a clean slate. They'll examine every inch of the decking beneath (think of it as your roof's backbone) to ensure it's strong and sturdy.
Next comes the fun part: layering your new roof like a well-crafted sandwich. First, there's the underlayment – your roof's waterproof undershirt. Then comes the flashing – those crucial metal pieces that keep water from sneaking into corners and valleys. Finally, shingles are installed with military precision, creating an armor-like barrier against Mother Nature.
Want to maximize your insurance coverage? Working with public adjusters during your roof replacement can be a game-changer. They're like your personal advocates, helping you navigate claims and potentially secure better settlements for your roofing investment.
Remember: this isn't just about slapping new shingles on top – it's about creating a lasting shield that protects your biggest investment. Each step matters, from the smallest nail to the final inspection.
Key Takeaways
Ready to Give Your Roof a Makeover? Your Step-by-Step Guide to a Perfect Reroof
Think of your roof as a knight's armor – it needs proper planning and precise execution to protect your castle! Let's break down this home improvement journey:
Phase 1: The Detective Work
Before you climb that ladder, you'll need to play detective. Inspect every nook and cranny, secure those building permits, and get your materials lined up. Remember, failing to plan is planning to fail!
Phase 2: Out With the Old
Time to strip away those tired shingles! Working from top to bottom (like peeling an onion), carefully remove the old roofing materials. Safety first – you'll want proper harnesses, sturdy scaffolding, and containers for all that debris.
Phase 3: The Foundation Check
Your roof deck is like the canvas for a masterpiece – it needs to be flawless. Hunt down any soft spots, repair damaged wood, and ensure everything's rock-solid before moving forward.
Phase 4: Building Your Shield
Layer by layer, build your new roof like a premium sandwich: underlayment first (your moisture barrier), followed by flashings (your waterproof armor), and finally, those beautiful new shingles. Start at the bottom edge and work your way up, creating perfect overlaps.
Phase 5: The Final Touch
Think of this as your quality assurance sweep. Install proper ventilation (your roof needs to breathe!), run a thorough inspection, and clean up like a pro. Don't forget that magnetic sweep – those sneaky nails can be tire killers!
Want a roof that'll make the neighbors jealous while keeping your home snug and dry? Follow these steps, and you'll nail it!
Planning Your Roof Replacement Project
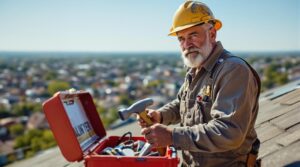
A successful roof replacement project begins with thorough planning and professional consultation. The initial phase typically spans 1-2 days, during which contractors inspect the current roof condition and discuss material options with homeowners. This assessment leads to detailed recommendations and budget considerations based on specific needs and preferences.
The planning phase extends 1-4 weeks, encompassing critical steps such as obtaining necessary permits, coordinating with suppliers, and ensuring compliance with local building codes.
Contractors will review existing inspection records and prepare a detailed project timeline. The preparation process includes confirming material availability, addressing structural concerns, and conducting pre-installation inspections.
Each step is designed to create a solid foundation for the actual installation work while maintaining safety standards and regulatory requirements.
Working with public adjusters during the planning phase can significantly increase insurance settlement amounts for covered roof damage.
Removing Old Roofing Materials

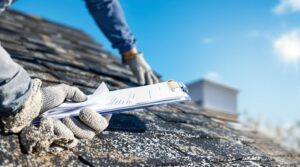
Tearing off old roofing materials demands careful attention to safety protocols and systematic execution. The process begins at the roof's peak, where workers remove ridge caps and shingles in manageable sections of 2-3 feet wide, working downward methodically.
Essential safety measures include wearing protective gear and using specialized tools like tear-off forks or notched shovels.
As the removal progresses, workers carefully extract old flashing, underlayment, and roofing components while checking for rotted areas in the sheathing.
Efficient debris disposal involves using tarps or plywood sheets to catch falling materials and prevent property damage.
After removing all old materials, the roof deck undergoes thorough cleaning and inspection, ensuring no nails or staples remain.
This meticulous preparation creates an ideal surface for installing new roofing materials.
To document the tear-off process properly, take detailed photos with date-stamped evidence of each stage within 72 hours.
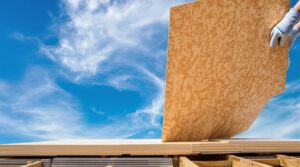
Preparing the Roof Foundation

Proper preparation of the roof foundation begins with thorough inspection and cleaning of the exposed roof deck. This critical phase guarantees structural integrity and longevity of the new roof installation.
The foundation soil must be properly compacted and treated to prevent future settling issues.
Key preparation steps include:
- Clearing the site of debris and marking the foundation layout using string lines and spray paint
- Installing proper drainage systems and applying anti-termite treatment before concrete pouring
- Erecting sturdy formwork with steel reinforcement bars while maintaining precise vertical alignment
Professional contractors utilize plate compactors to increase soil density and load-bearing capacity.
The installation of plastic sheeting provides additional protection before concrete pouring.
After completion, the foundation requires several weeks of curing time, followed by a thorough inspection to verify structural soundness.
CDX grade plywood is the standard material choice that meets residential roofing requirements.
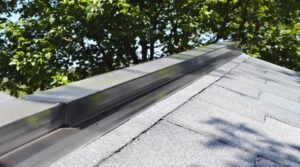
Installing New Roofing Components

Following thorough preparation of the roof foundation, installation of new roofing components begins with precise layering of protective elements. The process requires careful attention to roof underlayment installation and strategic flashing techniques to guarantee proper water resistance.
| Component | Installation Method |
|---|---|
| Underlayment | Start at eave, overlap 2", secure every 4-6" |
| Valley Flashing | Install with 6" vertical overlap |
| Shingles | Begin at eave, stagger seams upward |
| Ridge Cap | Overlap pieces for secure ridge seal |
Professional installers systematically layer these components, beginning with a continuous underlayment barrier. Flashing is then precisely positioned around valleys, end walls, and other vulnerable areas. The final phase involves careful installation of shingles according to manufacturer specifications, followed by proper ventilation systems and weatherproofing measures. Each step requires meticulous attention to guarantee long-term roof integrity and weather protection. Maintaining detailed damage documentation records throughout the installation process helps support potential future insurance claims for weather-related issues.
Final Steps and Quality Assurance

After completing the installation phase, contractors must execute a thorough quality assurance process to guarantee the roof replacement meets all specifications and safety standards. This includes removing all construction debris, conducting extensive inspections, and ensuring all roofing permits are properly closed out.
Critical final steps include:
- Performing a meticulous cleanup using dumpsters and magnetic tools to collect nails and debris
- Conducting detailed inspections of all roofing components to verify proper installation
- Documenting the entire process and providing homeowner education on maintenance
The process concludes with a final walk-through with the property owner, during which contractors address any concerns and provide detailed information about warranty coverage, maintenance requirements, and recommended inspection schedules to maximize the roof's lifespan.
The Benefits Of Consulting A Public Adjuster

A public adjuster offers specialized expertise in maneuvering complex insurance claims, providing objective assessments of roof damage and detailed documentation to support claims.
Their professional involvement typically leads to higher settlement amounts through skilled negotiation with insurance companies and extensive understanding of policy coverage.
Studies show that public adjusters help property owners achieve 800% higher settlements when managing insurance claims for property damage.
Expertise In Insurance Claims
Insurance claims for roof replacement can be complex and overwhelming for homeowners to navigate alone. Public adjusters possess extensive insurance policy knowledge and proven adjuster negotiation skills that can greatly impact claim outcomes. These professionals understand policy nuances and guarantee homeowners receive maximum benefits under their coverage.
When working with a public adjuster, homeowners can expect:
- Thorough documentation and organization of all claim-related materials
- Direct communication with insurance companies, eliminating stress and confusion
- Expert advocacy throughout the settlement process, often resulting in higher payouts
While public adjusters typically charge up to 10% of the settlement, their expertise often leads to larger claim settlements that offset their fees. They work on a contingency basis, requiring no upfront costs from homeowners. Studies show that settlements involving public adjuster involvement increase by 20-50% compared to independent claims.
Objective Damage Assessment
Professional damage assessment begins with certified public adjusters employing advanced technology and proven methodologies to evaluate roof conditions.
Using specialized equipment like moisture detection tools and infrared scanning cameras, adjusters can identify hidden water damage and temperature variations that indicate potential problems beneath the surface.
The assessment process includes extensive aerial inspections using drones to capture detailed views of the entire roof structure.
This thorough approach guarantees that no damage goes unnoticed, whether it's structural issues, water infiltration, or storm-related problems.
Every finding is meticulously documented through detailed photographs and technical reports, creating a complete record of the roof's condition.
This evidence-based assessment provides essential documentation for insurance claims and helps secure fair compensation for necessary repairs or replacement.
With less than 5% of policyholders aware of public adjusters' services, many miss out on professional assessment benefits that could maximize their claim settlements.
Streamlined Claim Process
When homeowners partner with certified public adjusters, they gain access to a streamlined claims process that greatly reduces complexity and processing time.
Through accelerated efficiency and streamlined documentation, public adjusters interface directly with insurance companies while managing all required paperwork and discussions.
Settlements with public adjuster involvement typically increase payouts by 20% to 50% compared to self-managed claims.
Key benefits of working with public adjusters include:
- Reduction in claim cycle times by up to 15 days through automated processes and remote bidding capabilities
- Enhanced accuracy through detailed assessments utilizing aerial imagery and real-time market data
- Extensive support including coordination between contractors and insurance companies, plus quality control measures to guarantee accurate initial assessments
This systematic approach minimizes the need for supplements and revisions while guaranteeing transparent pricing through competitive, actionable bids from vetted local contractors.
Higher Claim Payouts & Settlements
The most compelling reason to engage a public adjuster lies in their proven ability to secure substantially higher claim settlements. Studies demonstrate that policyholders who utilize public adjusters receive settlements averaging 574% higher than those who negotiate independently.
Through effective claim optimization strategies, these professionals leverage their expertise in policy interpretation and damage assessment.
Public adjusters excel at maximizing insurance settlements through their thorough understanding of coverage terms, local building standards, and documentation requirements. They meticulously evaluate all aspects of roof damage, ensuring no detail is overlooked during the claims process.
Their independent advocacy eliminates potential conflicts of interest, as they work solely for the policyholder. Operating on a contingency basis, public adjusters are inherently motivated to secure the highest possible settlement while managing all aspects of the claim.
Licensed professionals must maintain complete independence from both insurance companies and roofing contractors to provide unbiased claim representation.
About The Public Claims Adjusters Network (PCAN)

Licensed public claims adjusters across California have united to form the Public Claims Adjusters Network (PCAN), an organization dedicated to maintaining high industry standards and protecting policyholder interests.
PCAN members specialize in public adjuster roles including policy analysis, claims negotiation, and settlement maximization for property damage cases.
The organization emphasizes three core principles:
- Strict adherence to state licensing requirements and ethical guidelines
- Thorough representation of policyholders during insurance claims processes
- Continuous professional development to stay current with industry practices
PCAN members provide expert guidance throughout the claims process, from initial damage assessment to final settlement.
Their collective expertise helps guarantee policyholders receive fair compensation while maintaining compliance with California Insurance Code regulations and consumer protection standards.
Members regularly participate in continuing education workshops to maintain their state-mandated licenses and stay updated on industry regulations.
Frequently Asked Questions
Can I Live in My House During Roof Replacement?
Under the echoing sounds of hammers above, homeowners can safely reside in their houses during roof replacement, though they should prepare for noise concerns and follow roofing safety protocols throughout construction.
How Long Does a Typical Roof Replacement Take?
A typical roofing timeline ranges from 1-7 days, with project duration depending on roof size, material type, weather conditions, and complexity. Most residential replacements complete within 3-5 working days. Homeowners should also consider the specific needs of their property when scheduling a roofing project. In some cases, roof restoration benefits over replacement can provide a cost-effective solution while extending the life of an existing roof. Additionally, restoration typically involves less labor and time, allowing homeowners to avoid the disruptions that can accompany a full roof replacement.
What Happens if It Rains During Roof Installation?
Rain delays interrupt installation and can cause moisture damage to exposed materials. Contractors protect the roof with tarps, suspend work for safety, and guarantee surfaces dry before resuming installation.
Should I Replace My Gutters When Getting a New Roof?
Studies show 90% of foundation damage stems from poor gutter systems. Whether replacing gutters depends on their condition, with professional inspection of different gutter types and current maintenance status being essential factors.
Are Solar Panels Removed and Reinstalled During Roof Replacement?
Solar panels must be removed before roof replacement begins. The solar panel removal and reinstallation process typically requires professional coordination with the original installation company to maintain warranties.
References
- https://www.familyhandyman.com/project/how-to-roof-a-house/
- https://www.cedur.com/different-types-of-roof-materials-for-homes
- https://ateamroofingandsolar.com/the-roof-replacement-process-step-by-step-guide/
- https://www.billraganroofing.com/blog/process-replace-roof
- https://ls-usa.com/blog/best-roofing-material
- https://www.stormhelppro.com/blog/residential-roofing/what-is-the-average-timeline-for-a-basic-roof-replacement/
- https://www.roof-crafters.com/learn/the-9-step-process-to-your-roof-replacement
- https://www.crownroofingltd.com/the-phases-of-a-typical-roof-replacement-process
- https://thethirdestimate.com/what-is-the-typical-timeline-for-a-roofing-project/
- https://www.straightlineconstruction.com/blog/process-tearing-off-roof