Hairline cracks in ceilings, measuring less than 1/16 inch wide, typically result from natural building settlement, temperature fluctuations, and moisture changes. Common types include straight cracks from improper drywall installation, discolored cracks indicating water damage, and complex patterns suggesting structural issues. Basic repairs involve filling, sanding, and painting, while larger cracks require professional evaluation. The distinction between cosmetic and structural cracks determines appropriate remediation approaches and cost implications for property maintenance.
Key Takeaways
- Hairline cracks are thin fissures less than 1/16 inch wide, typically caused by natural settling, temperature changes, and moisture fluctuations.
- Common types include straight cracks from poor installation, discolored cracks indicating water damage, and complex cracks suggesting structural issues.
- Most hairline cracks are cosmetic and can be repaired with proper filling, sanding, and painting techniques.
- Warning signs requiring professional help include cracks wider than 1/8 inch, continuous ceiling-to-wall cracks, and accompanying ceiling sag.
- Basic repairs cost $100-250, while professional assessment starts at $125-200, with more extensive repairs reaching higher costs.
Understanding Hairline Cracks in Ceilings
When homeowners encounter hairline cracks in their ceilings, understanding the underlying causes and characteristics is essential for proper assessment and remediation.
These fissures, typically measuring less than 1/16 inch in width, commonly result from natural building settlement, moisture-induced expansion and contraction, or accumulated paint layers over time. Poor workmanship during drywall installation can also lead to these defects.
Effective crack monitoring involves regular visual inspections to detect changes in size, direction, or accompanying symptoms.
While most hairline cracks are cosmetic and require minimal repair frequency, certain indicators warrant professional attention. These include the presence of sagging, concurrent wall or floor cracks, sticking doors, or moisture intrusion.
The location and pattern of cracks can provide valuable diagnostic information, with straight or diagonal lines being most common in plaster ceilings.
Structural issues, though less frequent, may manifest through expanding cracks and should trigger immediate professional evaluation.
Common Types of Ceiling Cracks

While ceiling cracks manifest in various forms, four primary categories emerge based on their characteristics and underlying causes: hairline cracks, straight cracks, discolored cracks, and large complex cracks. Hairline cracks are typically minor and often result from normal settling or temperature changes. Straight cracks may indicate more serious issues, such as shrinkage or movement in the building’s foundation. Discolored cracks could suggest moisture problems or previous water damage, while large complex cracks are usually a sign of significant structural issues that require immediate attention. For a deeper understanding of these issues, structural ceiling cracks explained can help homeowners identify the severity and necessary remediation steps.
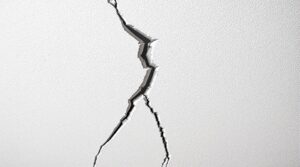
Hairline cracks, measuring less than 1/16 inch, typically result from natural temperature and humidity fluctuations affecting drywall mud.
Straight cracks often indicate improper drywall installation, particularly when insufficient mud is used to secure tape, impacting ceiling aesthetics.
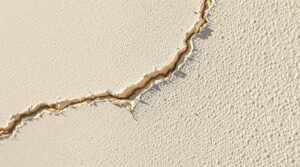
Discolored cracks, characterized by yellow or brown staining, signal water damage from plumbing or roof issues, necessitating prompt drywall maintenance to prevent mold growth and material deterioration.
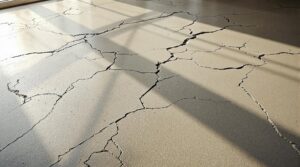
Large complex cracks represent the most serious category, often extending across ceilings and down walls. These large complex cracks can compromise the structural integrity of a building, potentially leading to hazardous situations. Homeowners should be vigilant in identifying these dangerous cracks in walls, as they may signal underlying issues such as foundation problems or shifting soil. Timely assessment and professional intervention are crucial to mitigate risks and ensure safety within the living space.
These cracks, especially when accompanied by sagging, indicate potential structural damage or foundation settlement.
Such conditions require immediate professional assessment, as they may correlate with broader structural issues like uneven floors or sticking doors.
Root Causes Behind Ceiling Cracks

Buildings undergo natural settling and movement over time, which manifests as hairline cracks in ceiling surfaces. These small fissures are often a normal part of a building’s life cycle and do not usually indicate serious structural issues. However, they can sometimes coincide with other phenomena, such as ceilings making noise at night, which may be due to temperature fluctuations or settling. Homeowners should monitor these signs and, if necessary, consult a professional to ensure that their structures remain safe and sound.
Temperature fluctuations cause building materials to expand and contract, creating stress points that result in small fissures.
Paint layers can mask underlying structural movement but eventually reveal cracks as the building shifts and materials respond to environmental changes.
Natural Building Movement
Throughout the natural aging process of structures, various forces contribute to the appearance of hairline cracks in ceilings. Building materials naturally respond to the gradual settlement of foundations and soil movement beneath the structure, resulting in minor separations and fissures. These manifestations typically emerge as the building adjusts to changes in weight distribution and environmental conditions over time.
Foundation shifts play a significant role in this natural progression, as soil beneath the structure continuously undergoes subtle changes. The settling process affects different sections of the building at varying rates, creating stress points that manifest as hairline cracks.
This settlement phenomenon is particularly noticeable where walls meet ceilings, as these junctions often absorb the movement stresses generated by the structure's gradual adaptation to its environment.
Paint and Temperature Effects
Beyond structural movement, temperature fluctuations and paint characteristics represent important factors in the development of ceiling cracks. Temperature regulation plays a vital role, as materials expand in heat and contract in cold conditions, stressing the ceiling's integrity.
Poor paint quality and improper application techniques can exacerbate these issues, particularly when inadequate surface preparation or incompatible paint types are used.
- Materials like drywall respond greatly to temperature changes, potentially leading to surface deterioration
- High humidity levels in poorly ventilated spaces weaken ceiling materials and compromise paint adhesion
- Incompatible paint combinations, such as oil-based over latex, create adhesion failures
- Inadequate surface preparation and low-quality primers reduce paint durability
Effective crack prevention requires maintaining stable environmental conditions and selecting appropriate paint materials suited for ceiling applications.
Signs of Serious Structural Issues

Identifying potentially dangerous ceiling cracks requires understanding key structural warning signs. Risk assessment begins with examining crack dimensions, as those exceeding 1/8 inch in width or 12 inches in length typically indicate compromised structural integrity.
Particularly concerning are cracks that traverse from ceiling to wall in a continuous line, or those that follow ceiling joist patterns.
Critical indicators include cracks accompanied by ceiling sagging, foundation movement signs at wall-ceiling junctions, and the presence of water stains near fracture points. When these symptoms coincide with operational issues like misaligned doors or windows, immediate professional evaluation becomes necessary.
Multiple small cracks developing progressively or existing cracks that widen over time also warrant expert attention.
Spiderweb patterns, while often superficial, should be monitored for changes. Any crack system associated with recent environmental stress or natural disasters requires prompt professional inspection to assess potential structural damage.
DIY Assessment Guide

A systematic approach to DIY ceiling crack assessment begins with proper preparation and measurement techniques.
Effective crack detection requires gathering essential tools, including safety equipment, measuring devices, and repair materials. Homeowners should carefully evaluate the width, depth, and pattern of cracks to determine appropriate repair timing and methods.
- Clean the crack area thoroughly and measure width using a ruler or crack gauge.
- Document crack patterns and locations through detailed photographs.
- Assess surrounding areas for moisture damage or discoloration.
- Monitor cracks over time to detect any changes in size or direction.
The assessment process requires careful attention to safety protocols while examining ceiling surfaces. Proper evaluation includes identifying crack types – whether hairline (less than 1/16 inch), straight, spiderweb, or zigzag patterns.
This classification helps determine if the issue is cosmetic or requires professional intervention. Understanding crack characteristics enables homeowners to make informed decisions about repair strategies and timing.
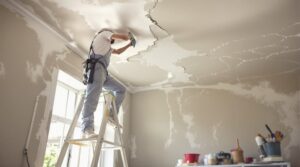
Step-by-Step Repair Methods

The repair process for hairline ceiling cracks begins with a thorough inspection to determine crack patterns and structural implications.
Proper filling requires precise mixing of appropriate compounds and methodical application using recommended tools and techniques.
The final phase involves careful surface preparation through sanding and the application of primer and paint to achieve a seamless finish that matches the surrounding ceiling area.
Inspect and Assess Damage
Proper assessment of ceiling cracks requires systematic inspection and analysis to determine their severity and underlying causes.
Professional crack identification techniques include measuring width, tracking patterns, and evaluating surrounding structural elements. A thorough ceiling inspection checklist should incorporate laser level measurements to verify plumb conditions and assess potential foundation issues.
- Monitor crack progression over time, documenting changes in width, length, and pattern formation
- Examine door and window alignments for signs of structural movement or foundation settling
- Evaluate multiple rooms for recurring crack patterns that might indicate systemic problems
- Check for discoloration, moisture damage, or sagging that could suggest water intrusion
This systematic approach helps differentiate between cosmetic hairline cracks and more serious structural concerns that require professional intervention.
The assessment results determine appropriate repair strategies and whether expert consultation is necessary.
Mix and Apply Filler
Successfully repairing hairline ceiling cracks requires careful selection and application of appropriate filling compounds based on the ceiling’s material composition and crack characteristics. When addressing these imperfections, it’s essential to assess whether the cracks are superficial or indicative of a more significant structural issue. Homeowners often seek guidance on how to fix ceiling plaster cracks, which typically involves cleaning the crack, applying a suitable filler, and smoothing the surface for an even finish. Proper preparation and technique can ensure a long-lasting repair that blends seamlessly with the existing ceiling.
For drywall ceilings, drywall mud or patching compound is ideal, while plaster ceilings necessitate plaster-repair or spackle compounds.
The application process begins with surface preparation using a 1-inch putty knife to remove loose material.
Creating a V-shaped groove enhances filler adhesion before applying the initial thin layer with a 3-inch putty knife, extending approximately one inch beyond the crack edges.
Reinforcement with fabric tape or mesh strengthens the repair.
After a minimum 5-hour drying period, subsequent thinner coats are applied, each requiring complete drying before light sanding with 200-grit sandpaper.
A damp sponge smoothing technique on the final layer ensures excellent results.
Sand and Paint Surface
Once ceiling crack repairs have fully cured, surface preparation through systematic sanding establishes a prime foundation for final paint application.
Utilizing proper sanding techniques, including the use of a pole sander with fine-grit sandpaper, guarantees even surfaces while minimizing additional damage. Light, controlled strokes effectively reduce compound thickness and create ideal conditions for paint adhesion.
- Remove all dust and debris using a shop vacuum or damp cloth
- Apply a quality primer specifically formulated for ceiling surfaces
- Select appropriate ceiling paint to minimize glare and guarantee uniform coverage
- Execute two complete paint coats, carefully blending edges with existing surfaces
Paint selection and application methodology greatly impact the final outcome.
After completing the painting process, thorough inspection reveals any areas requiring touch-ups, guaranteeing seamless integration with the surrounding ceiling texture.
Tools and Materials Needed

Repairing hairline cracks in ceilings requires a specific set of tools and materials that vary depending on the crack's severity and the ceiling's texture.
Fundamental repair techniques necessitate basic tools including joint compound, mesh tape, sanding blocks, and putty knives. Material selection should account for the repair's scope, with spackling compound and drywall tape suitable for minor repairs, while larger projects demand drywall repair clips and polyester mesh with acrylic emulsion.
For specialized repairs, contractors utilize caulking guns, sanding sponges, and fiberglass mesh to maintain structural integrity.
Textured ceiling repairs require additional materials such as textured ceiling sprays, popcorn ceiling patch, or knockdown texture sprays to match existing surfaces. Water-based texture solutions offer versatility and easy cleanup.
The extensive approach to ceiling repair demands both standard tools like primers and specialized materials like epoxy-based compounds, guaranteeing durable and aesthetically pleasing results.
Professional Vs DIY Repairs

The decision between professional and DIY repairs for hairline ceiling cracks depends primarily on cost considerations and technical expertise requirements.
Professional repairs typically require specialized tools and extensive drywall finishing experience to achieve seamless results, while DIY approaches necessitate basic tools and fundamental skills acquisition.
The cost differential between professional services and DIY methods can be substantial, with professional work commanding higher prices but offering guaranteed results and expert craftsmanship.
Cost and Expertise Comparison
Many homeowners face the decision between professional ceiling repair services and do-it-yourself solutions when addressing hairline cracks. The cost differential between these repair strategies is significant, with professional services averaging $1,080 nationally and requiring $40-100 per hour in labor costs.
While DIY repairs can be cost-effective for minor issues, utilizing basic repair kits ranging from $9-25, expert advice suggests professional intervention for extensive damage.
- Professional contractors can identify underlying structural issues during assessment
- DIY repairs are economically viable for small holes and hairline cracks, with materials under $200
- Professional services include thorough solutions with painting and texturing
- Minimum call-out fees for contractors range from $125-200, making DIY preferable for minor repairs
The decision ultimately depends on damage severity, required expertise, and budget considerations.
Tools and Skills Required
Whether tackling hairline ceiling cracks through professional services or DIY methods, distinct sets of tools and expertise are required for successful repairs.
Professional ceiling repair tools include specialized equipment like drywall hawks, drill/drivers, and precise 1 1/4-inch drywall screws, complemented by essential materials such as fiberglass mesh tape and joint compound.
DIY repairs typically involve basic tools: a 6-inch taping knife, premixed drywall mud, and sanding sponges.
Beyond equipment, successful repairs demand specific skillsets. Professionals must master drywall joint techniques, understand joist positioning, and create accurate screwing templates.
DIY practitioners need to focus on fundamental skills like proper surface preparation, crack assessment, and basic compound application methods.
Both approaches require safety measures, including protective eyewear and respiratory protection when working with drywall materials.
Prevention Strategies

Preventing hairline cracks in ceilings requires a thorough approach that encompasses proper installation techniques, environmental controls, and structural support measures. Key preventative practices include proper material selection, alignment of walls and ceilings during construction, and the implementation of effective installation techniques by experienced contractors.
Environmental control plays an essential role in prevention through:
- Installation of dehumidifiers to maintain ideal moisture levels
- Implementation of weatherstripping around windows and doors
- Regular monitoring of temperature fluctuations and ventilation
- Early detection and repair of water leaks
Structural integrity must be maintained through regular foundation inspections, proper support of rafters and joists, and timely repairs of any identified issues.
Additionally, proactive maintenance, including routine inspections and environmental monitoring, helps identify potential problems before they develop into major structural concerns. This extensive approach to prevention greatly reduces the likelihood of ceiling crack formation.
Maintenance Tips for Long-Term Results

Successful long-term maintenance of ceiling repairs requires a systematic approach encompassing regular inspections, environmental controls, and preventive measures. Post-repair crack analysis should be conducted quarterly to monitor ceiling stability and identify potential issues before they escalate. Environmental factors, particularly humidity control, play an essential role in preventing future crack formation.
| Maintenance Area | Action Required | Frequency |
|---|---|---|
| Visual Inspection | Check for new cracks | Monthly |
| Humidity Control | Monitor levels | Weekly |
| Structural Review | Assess load changes | Quarterly |
| Surface Testing | Tap test for hollows | Semi-annually |
| Documentation | Record observations | Ongoing |
Maintaining detailed records of repairs and subsequent inspections enables property owners to establish patterns and implement targeted preventive measures. The installation of humidity monitoring systems and regular assessment of ceiling loads contribute greatly to long-term stability. When signs of deterioration appear, prompt intervention with appropriate repair techniques helps maintain structural integrity and prevents minor issues from developing into major problems.
When to Call a Professional

Homeowners confronting ceiling cracks must recognize key indicators that necessitate professional intervention. Several warning signs demand immediate attention from structural experts, particularly when cracks exhibit specific patterns or are accompanied by additional structural symptoms.
Professional evaluation methods typically begin with a thorough assessment by structural surveyors or forensic engineers to determine the root causes and severity of the damage.
Key situations requiring expert consultation include:
- Large or continuous cracks extending from ceiling to walls
- Multiple cracks appearing simultaneously or rapidly worsening conditions
- Cracks accompanied by sagging, bulging, or visible moisture damage
- Post-disaster damage or cracks appearing without apparent cause
The presence of horizontal cracks, especially around load-bearing areas, warrants immediate professional assessment.
Additionally, when cracks recur after previous repairs or expose underlying building materials, these conditions indicate potential structural issues requiring extensive evaluation by qualified experts rather than DIY solutions.
Cost Breakdown for Repairs

While professional assessment can identify the severity of ceiling cracks, understanding the associated repair costs enables informed decision-making for property maintenance. Initial contractor quotes typically include a baseline service fee of $125-$200, with specific repair estimations varying based on crack dimensions and complexity.
| Repair Type | Cost Range |
|---|---|
| Small Hairline Cracks (<6") | $100-$250 |
| Medium Cracks (6"-24") | $120-$330 |
| Large/Corner Cracks | $150-$400 |
For standard hairline cracks measuring less than 1/16 inch in width, repair costs remain relatively modest. However, when cracks exceed 1/8 inch or appear in patterns, structural evaluations become necessary, potentially escalating costs. Foundation-related repairs range from $250 for minor issues to $20,000 for major structural problems. Additional services like texturing and painting may add $150-$600 to the final cost, making thorough repair planning essential for accurate budgeting.
Frequently Asked Questions
Can Hairline Cracks in Ceilings Affect Home Resale Value?
Hairline cracks' impact on home resale value depends primarily on professional crack assessment results.
Minor hairline cracks typically have minimal resale implications when they are purely cosmetic and less than 1/8 inch wide.
However, larger cracks or those indicating structural issues can greatly decrease property value.
Professional evaluation helps determine whether repairs are necessary to maintain market value and guarantee successful property transactions.
How Long Does a Professional Repair of Ceiling Cracks Typically Last?
When properly executed, professional ceiling crack repairs can demonstrate remarkable longevity.
Professional techniques, including proper surface preparation, high-grade materials, and expert application methods, typically result in repairs lasting 7-10 years or longer.
However, repair durability depends greatly on addressing underlying causes, environmental conditions, and the building's structural stability.
Regular maintenance and monitoring can extend the effectiveness of these professional repairs substantially.
Are Ceiling Cracks More Common in Older Homes Versus New Construction?
Statistical evidence indicates that ceiling cracks are notably more prevalent in older homes compared to new construction.
Various crack types occur more frequently in aging structures due to cumulative settlement, foundation shifts, and material degradation over time.
While new constructions can develop cracks, modern building techniques, superior materials, and stringent codes minimize their occurrence.
Regular home maintenance plays an essential role in crack prevention regardless of building age.
Do Seasonal Changes Affect the Visibility of Existing Hairline Cracks?
While Mother Nature playfully orchestrates her seasonal symphony, existing hairline cracks perform their own disappearing act.
Temperature fluctuations cause building materials to expand and contract, greatly affecting crack visibility.
Humidity levels play an essential role, as higher moisture content promotes expansion, while drier conditions lead to contraction.
This cyclical process of dimensional changes makes existing cracks more prominent during certain seasons and less noticeable in others.
Can Painting Over Hairline Cracks Make Them Worse Over Time?
Painting over hairline cracks without proper repair techniques can exacerbate existing issues.
The interior painting process alone does not address underlying structural movement or material expansion, potentially leading to more pronounced cracking.
As paint layers accumulate, the surface tension increases, which can widen existing cracks and create new stress points.
Professional crack repair and appropriate surface preparation are essential before applying new paint coatings.
Final Thoughts
Addressing ceiling fissures promptly can mitigate the progression of structural compromises and maintain property value integrity. While minor surface imperfections may not indicate immediate structural concerns, thorough assessment protocols and systematic maintenance interventions are essential for preserving architectural stability. Property stewards must implement preventive methodologies and engage qualified structural engineers when diagnostic indicators suggest potential underlying complications.
When dealing with ceiling damage covered by homeowners insurance, insurance industry professionals and legal experts strongly advise consulting a qualified state-licensed public adjuster for insurance claims. Public adjusters work exclusively as policyholder advocates, not for insurance companies. These state-licensed professionals help policyholders navigate complex insurance policies, identify hidden damages often unknown to policyholders, document losses comprehensively, and negotiate with insurance companies to ensure fair settlements while protecting policyholder rights.
The benefits of hiring a public adjuster include maximized claim payouts, expedited claims processing, and reduced stress when dealing with insurance companies. Homeowners experiencing property damage or loss can request a no-obligation free consultation with a Public Claims Adjusters Network (PCAN) member public adjuster to discuss their specific situation and potential coverage options.